
Can you see the failure in the body of the casting (in one of the two Nicro snatch blocks)? Guess it's no surprise it's in the one with the larger snap shackle, even tho' they are the same block/sheave size.
During the summer of 2005 I exchanged a few emails with Jack Tyler on WHOOSH about setting up and using a whisker pole. Simple enough, but everyone seems to have a different idea on setting one up. Here is a copy of that email exchange. Feel free to email me to add, criticize or comment. Also, be sure to check out Jack's website at http://www.svsarah.com/Whoosh/Whoosh%20Main%20Page.htm. He has a substantial amount of material on preparing your boat to cruise Europe.
Steve to Jack:
"I have a question for you (if you use a whisker pole). Do you attach your pole to your lazy sheet, working sheet or to the clew. Seems like people do it different ways."
Response from Jack:
It's just one way to look at it, of course, but while I've done all of those, the only method that seems safe to me is to reave the active sheet thru a block on the end of the pole. We shackle a Snatch Block to the pole end after temporarily laying the pole end on the lifeline near the pulpit (a small lanyard around the lifeline and pole means the pole can't get away), reave the sheet thru the block, and then fix the pole 'in space' (foreguy, afterguy, topping lift). Depending on how much wind you have or how blocked the jib is by the main, you may find you can do this while the sail is out; if more wind, you'll do it with the sail rolled up. The sheet-thru-block choice allows one to trim, reef or furl the jib (e.g. if a squall arrives), then pull it back out, all as you normally would, without going forward or fussing with the pole. Would that approach work in your case, given how your pole and hardware are set up?
Response from Me:
"For the afterguy, do you actually run a second line back from the pole end in addition to the sheet, or are you renaming the active sheet line the afterguy?"
Response from Jack:
No, I'm not referring to the sheet. I made up a very simple bridle, dacron double braid, with a carabiner captured in the middle by a figure-8. I marked both ends of the line where they are likely to terminate at the forward and mid-ships cleats, their anchor points, so set-up is simplified. With the pole resting on the lifeline, captured by its lanyard, the bridle is attached and lines led fore and aft and secured to the cleats (but the aft one can't yet be adjusted). The sheet is also attached (snatch-block) and then the pole is raised and after guy tensioned. The whole point is to get the pole end to be a fixed point in space. I also use a fixed length (unadjustable) topping lift for the pole, with only the inboard end of the pole being adjustable by up/downhaul. The length is fixed so that the pole is horizontal when everything is positioned properly. This means one less line to control when moving/setting up the pole. You probably have a nifty Selden adjustable pole that's relatively light. Mine is a true 4" OD spinnaker pole that I've shortened; it's a handful, and anything to make things easier is a big help for me.
Question from me:
"Second question is on the use of the Snatch Block on the end of the pole. It seems to me the loads are pretty high out there. I've had Snatch Blocks blow up on me in the past (well one time anyway) and have tended not to use them in high load situations. As I recall, the Mfg's don't like a turn angle more than 20 degs when using a Snatch Block."
Response from Jack:
I'd say the opposite. Snatch blocks were developed in part to turn the spinnaker sheet thru +/-160 degrees when run to the boat's quarter and back to the winch. Conversely, the sheeting angle from a headsail's clew to the genoa sheet block on deck will be quite small by comparison. It IS important the block attached to the pole end be fully articulating (just like at the base of your headstay) so loads in any direction aren't being localized. I was frustrated to discover that a hole cast in my pole end wasn't quite large enough to work with the snatch block's snap shackle...and the pole's main 'eye' formed by the casting & spring-loaded piston wasn't oriented properly. That's why I have to shackle on the snatch block, using a 2nd shackle. IMO the weak point in this arrangement is the pole end casting, given my beefy pole and a healthy snatch block. In your case, presuming an adjustable, smaller diameter pole and an overlapping genoa, it is likely the pole.
Having said all the above, I noticed that one of the two Nicro-Fico snatch blocks I inherited has a cracked shaft and so I try to avoid using it for any high-load uses. Those things can fail at the snap shackle and at the overlapping release, which unlatches to permit an already reaved line to be captured...and so mfgrs. tend to spec those parts properly. That just means someplace else becomes the weak point and that's what I see happened on my N-F block. They surely can fail. BTW I bought two huge snatch blocks by Garhauer that are in a very different league (but cost much less; go figure...). I've held them back for use with the asymetrical sheet but, as I write all this, realize I should probably be using one of them with the pole, too. Glad we chatted about this.
Further email from Jack:
Steve, that discussion on rigging a whisker pole was helpful to me as several niggling issues surfaced plus one obvious need: move to the bigger snatch block. Doing the latter mandated several other alterations to avoid chafe…and so I thought some pics might be helpful for me to keep and to share, as well. (Surely, a pic is better than some of my descriptions…
Can you see the failure in the body of the casting (in one of the two Nicro snatch blocks)? Guess it's no surprise it's in the one with the larger snap shackle, even tho' they are the same block/sheave size.
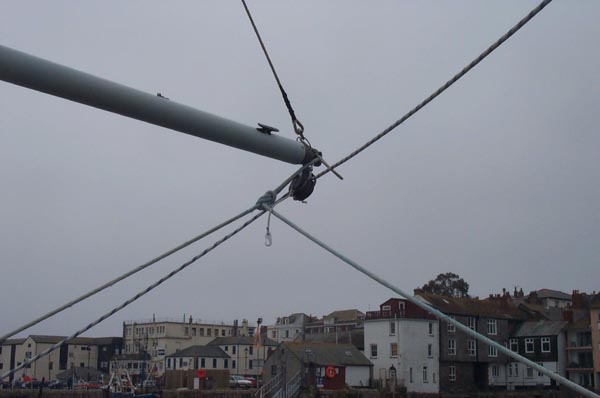
Whisker Pole End 1 shows how I've now fixed the Figure-8 loop (in the middle of the fore/afterguy bridle) in the pole's main eye so as to avoid chafe with the sheet. The snatch block has a little shock cord/hook tail which is used for another application. There's also an odd looking short 'something' coming off the pole end to the right; it's a wire lanyard run thru plastic tubing that serves as the pull handle when releasing the pin.
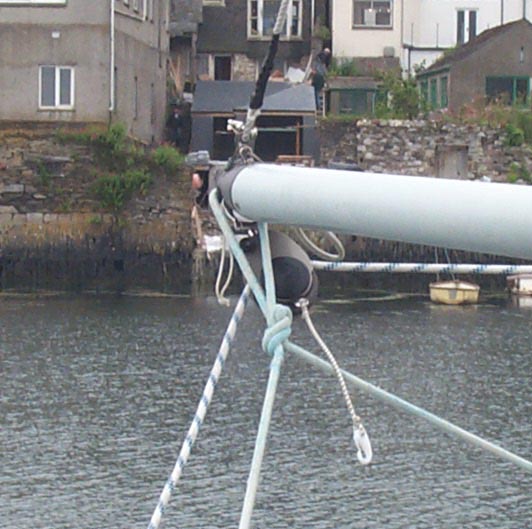
End 2 – just another view of the same arrangement.
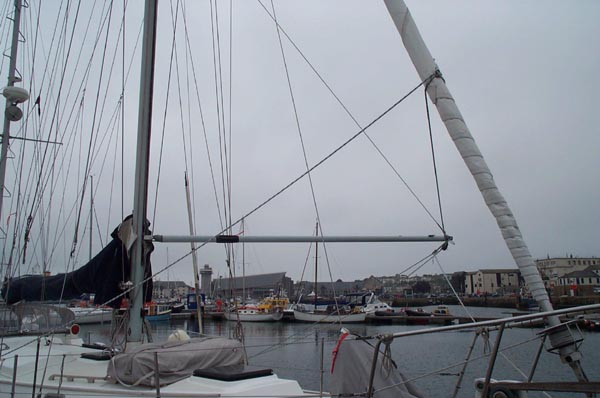
Whole Thing includes a glimpse of the Cornish harbor of Falmouth